Reviewed · DUBLIN TOURS
Dublin Jewellery Forge a Hammered Silver ring:Georges Street
The best part of this Dublin workshop is simple: you do not just buy a souvenir, you make one. In about two hours, you turn a strip of sterling silver into a ring by cutting, shaping, hammering, filing, and choosing the finish yourself.
I like the hands-on process, which gives you real control over the ring’s curve and texture. I also like the small-group setting, with a maximum of 12 people, plus coffee, tea, and plenty of chocolate while you work. The main drawback is the old building: there are many stairs and no lift, and late arrivals of more than 10 minutes are not admitted.
Quick takeaways from the George’s Street workshop
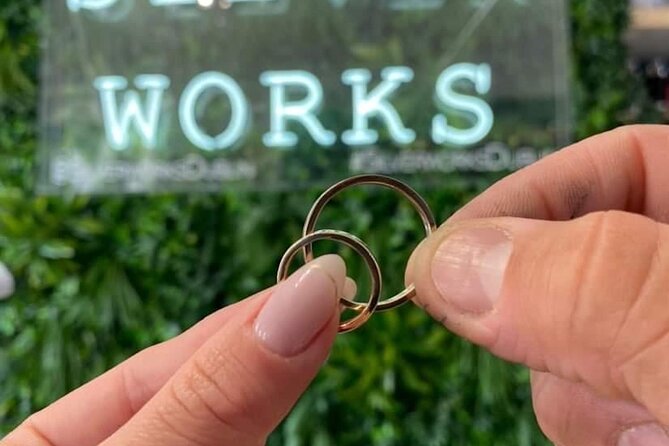
- Cut and shape your own sterling silver: You mark the silver for the finger you choose, cut it with a handsaw, and form it on a ring mandrel.
- Watch the soldering up close: The tutor handles the soldering and explains each step clearly before returning the work to you.
- Choose a personal texture: A planishing hammer lets you create one of three different textures, so no two rings need look alike.
- Make a style decision at the finish: You can polish the entire ring for a bright sparkle or polish only the inside for a more rustic look.
- Take home a useful souvenir: The finished ring is small, personal, and much more meaningful than another mass-produced item.
- Plan for stairs and punctuality: The workshop occupies two period buildings with no lift, and arriving over 10 minutes late means losing your place without a refund or rescheduling.
What makes this Dublin activity worth your time
Dublin has no shortage of pubs, museums, churches, and guided walks. Those are good choices, but they can leave you with photographs and memories rather than something you made with your own hands. This workshop offers a different kind of city experience.
You work with a real piece of sterling silver and follow a clear series of steps. The task is practical, not just decorative. You measure the metal, saw it, shape it, smooth it, hammer it, and decide how much shine it should have. That gives the finished ring a personal connection to your visit.
The activity costs $103.79 per person. That is not a bargain basement souvenir price, but it includes the silver, instruction, workshop time, and the finished ring. You are paying for an activity and an object at once. If you would otherwise spend money on a gift-shop ring, the value becomes easier to see.
The experience has received a 4.8 rating, with 95 percent of participants recommending it. Those figures fit the strongest pattern in the feedback: people praise the patient teaching, the relaxed mood, and the satisfaction of leaving with a ring they made themselves.
A few more Dublin half-days to weigh up
- Dublin to Cliffs of Moher, including Wild Atlantic Way and Galway
★ 5.0 · 23,331 reviews - From Dublin: Cliffs of Moher, Burren & Galway City Day Tour
★ 4.8 · 18,888 reviews - Dublin: Guinness Storehouse Entry Ticket
★ 4.6 · 16,863 reviews
Arriving at Silver Works on South Great George’s Street
The workshop begins and ends at Silver Works, 4 South Great George’s Street, Dublin 2, D02 NR59. The address is near public transportation, so it can fit neatly into a day spent around central Dublin.
You should treat the start time seriously. If you arrive more than 10 minutes late, you will not be admitted, and the booking cannot be refunded or moved to another session. Give yourself extra time to find the building and get there without rushing. Sawing and hammering silver is more fun when you are calm.
The studio sits in two beautiful old period buildings. That setting adds character, but it also brings practical limits. There are plenty of stairs and no lift. The buildings are not wheelchair accessible, so check this carefully before booking. The studio is small and cannot store luggage, so arrive with only what you need for the class.
The group can contain up to 12 people. Smaller sessions have received especially warm feedback, with groups of six or seven offering enough room to watch the demonstration and ask questions. Your exact group size can vary, but the maximum keeps the class from becoming a large, impersonal demonstration.
Choosing your finger and cutting the silver
The first real decision is which finger will wear the ring. You mark the silver to the length required, then use a handsaw to cut it to size.
This is a useful beginning because it makes the ring yours from the first minute. You are not choosing from a tray of finished designs. You are deciding what you want to create and learning the first basic tool skill along the way.
You do not need previous experience. The instructions are given step by step, and the workshop is designed for people who may never have held jewelry-making tools before. Several participants have described the process as easy to follow, including people who were nervous about their hand control or unsure of their crafting ability.
That does not mean you should expect a completely passive class. You will handle tools and take part in the work. If you prefer watching an expert make an item while you sit back, this is not the right activity. If you enjoy being shown how something works and then trying it yourself, it is a strong match.
Forming the band with a mallet
Once cut, the silver is shaped around a ring mandrel. You use a mallet to form the band into a ring shape.
This is one of the most satisfying parts because the flat strip begins to look like jewelry. The work also shows why the tutor’s guidance matters. A ring must be shaped with care, and the class gives you a controlled way to make progress without requiring professional silversmithing skills.
The tutor demonstrates the technique and stays available as you work. The teaching style is calm and reassuring, according to the feedback, which matters here. A little patience helps you avoid treating the metal like a nail that needs to be beaten into place.
The activity is suitable for older children and adults. One 14-year-old easily kept pace with the group. Children must be at least 10, and anyone under 16 must be accompanied by a paying adult who is also paying for the activity.
Same corner of Ireland, a completely different day out:
- Dublin to Cliffs of Moher, Burren, Wild Atlantic Way, Galway Tour
★ 5.0 · 12,924 reviews - Dublin to Belfast Black Cab, Dunluce Castle and Giant’s Causeway
★ 5.0 · 7,954 reviews - Kilkenny, Wicklow Mountains & Glendalough Day Tour from Dublin
★ 5.0 · 7,897 reviews - From Dublin: Wicklow Mountains, Glendalough & Kilkenny Tour
★ 4.8 · 6,235 reviews
The soldering demonstration is handled by the tutor

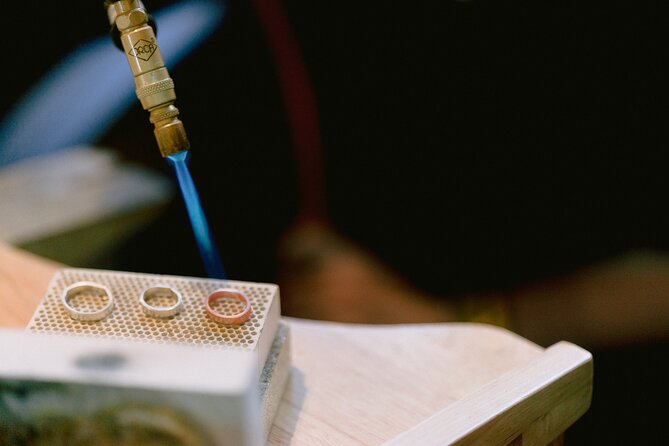
After the ring is formed, the tutor solders it. You watch this part rather than doing the soldering yourself, while the instructor explains exactly what is happening.
That division of work is sensible. Soldering involves heat and requires precision, so having an expert handle it keeps the process safe and helps ensure the ring holds together. You still remain involved because the tutor explains the reason for each step rather than disappearing behind a workbench.
Several instructors have been praised by name in past sessions, including Emily, Trisha, Cat, Owen, and Ava. The supplied feedback describes them as patient, clear, friendly, and encouraging. Your own tutor may be someone else, but the workshop’s teaching approach appears consistent: demonstrate first, guide you through the task, and step in when needed.
There is also a natural pause while the tutor completes this part. One participant noted that the instructor handled a stage of the process while the group took a short break. That gives you a moment to enjoy the coffee, tea, or chocolate and see how the ring is progressing.
Filing the curve that gives your ring its character
After soldering, you file the ring with different hand files. This is where you can shape the curve and soften or define the form.
Do not underestimate this stage. The curve can change the whole appearance of the ring. A subtle bend may look simple and refined, while a more noticeable shape can give the band a handmade, artistic quality. You are making a design choice, not just cleaning up rough edges.
This is also where the activity rewards patience. Filing takes steady effort, and you may need to work gradually rather than remove too much metal at once. The instructor can guide you, but the final look comes from your decisions.
If you are not naturally crafty, that is not a reason to avoid the class. The feedback repeatedly points to clear instruction and encouragement. People with shaky hands have still managed the tasks with help. You should expect an imperfect handmade character rather than factory-level uniformity, but that is part of the appeal.
Hammering one of three textures

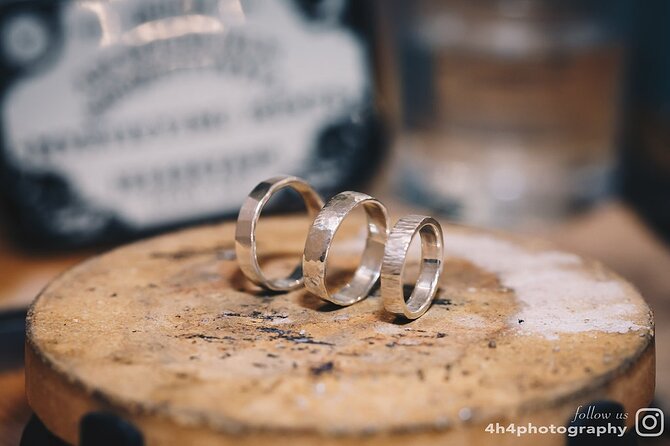
The planishing hammer is the tool that gives the ring its strongest visual signature. You choose from three different textures, then hammer the silver to create the finish you want.
This may be the most fun stage because the marks are made directly by you. The pattern does not come from a preselected souvenir design. It comes from the rhythm, placement, and pressure of your hammering.
You will want to listen closely to the tutor before starting. Hammer marks can quickly change the surface, so it helps to have a rough idea of the look you want. You can also embrace variation. A handmade ring does not need a perfectly repeated pattern to look good.
The textured finish is especially valuable if you are making rings as a pair or with family. Everyone can follow the same basic process but choose a different curve, hammer pattern, or level of polish. The result is a set of related souvenirs rather than identical ones.
Picking between a rustic and a bright polish
The final choice is the polish. You can have the ring polished all over for a glittery, bright finish, or polish only the inside for a more artistic and rustic look.
This choice gives you a clear way to match the ring to your taste. A fully polished ring may feel more traditional and eye-catching. Inside-only polishing leaves more of the hammered surface visible and makes the handmade marks part of the design.
I appreciate that the workshop does not force one idea of a finished ring. You are allowed to prefer sparkle or character. The texture, curve, and polish work together, so this final decision is worth considering before you hand over the piece for completion.
At the end, you keep the ring. It is ready to wear as a reminder of Dublin, and it carries the small imperfections and choices that make it personal. That is the central value of the activity: the souvenir is connected to a skill you learned and time you spent making it.
Coffee, chocolate, and the pace of the class
Coffee and tea are included, along with plenty of chocolate. These are small additions, but they suit the workshop well. You have several stages that require concentration, and a warm drink makes the room feel more social and relaxed.
The class is not presented as a formal lecture. You learn by watching, trying, asking questions, and getting help. The small group helps with that rhythm. You can see the tutor’s demonstration and check your work as you go.
The total duration is about two hours. That is long enough to create a genuine object but short enough to fit into a busy Dublin schedule. It works well on a rainy or cold day, when an indoor activity gives you a break from sightseeing.
Do not book it if you need to leave at a tightly fixed time immediately afterward. The stated duration is approximate, and hands-on classes can move at a slightly different pace depending on the group.
Who should book this ring-making class?
I would recommend it to couples, parents and older children, friends on a city break, and solo visitors who like meeting people through an activity. It also makes a thoughtful choice for anyone who wants a souvenir but has no interest in another T-shirt or standard gift-shop item.
It suits beginners especially well. You do not need jewelry-making skills, and the tutor explains the work carefully. You should be willing to use a handsaw, mallet, files, and hammer, though the teaching makes the process approachable.
It is less suitable if you have limited mobility because of the stairs and lack of a lift. It is also not suitable for children under 10. Young people under 16 need a paying adult beside them.
The workshop is a good choice for a family group, but remember that every participant needs a booking if they want to make a ring. An adult cannot simply accompany a child for free under the stated rules.
Booking, timing, and cancellation details
The activity is offered in English and uses a mobile ticket. Confirmation arrives at booking, which keeps the practical side simple.
It is often booked about 26 days ahead, so I would not leave it until the last evening of a popular Dublin visit. You can cancel for a full refund up to 24 hours before the start time. Cancellations and changes made less than 24 hours before the activity are not accepted for a refund.
Service animals are allowed, and most people can take part. The studio has no luggage storage, so plan to leave suitcases at your accommodation or another suitable location before arriving.
Should you book the Dublin Jewellery Forge experience?
Book it if you want a souvenir with a story attached to it. For $103.79, you receive sterling silver, instruction, refreshments, and a ring shaped and textured through your own choices. The price is fair for a two-hour craft session plus a finished piece you can wear.
The strongest reasons to go are the patient step-by-step teaching, the small maximum group size, and the control you have over the final design. You can make a bright ring, a rustic ring, a smooth ring, or a heavily textured ring, depending on your choices.
Skip it if stairs are a problem, if you cannot arrive on time, or if you want a low-cost, ready-made souvenir. For everyone else, this is one of Dublin’s more personal indoor activities. You leave with more than silver. You leave with a reminder that you made something in the city yourself.
FAQ
How long does the hammered silver ring workshop last?
The workshop lasts approximately two hours.
Where does the Dublin ring-making activity start and finish?
It starts and ends at Silver Works, 4 South Great George’s Street, Dublin 2, D02 NR59, Ireland.
Is sterling silver included in the price?
Yes. Sterling silver for your ring is included, along with coffee, tea, and chocolate.
Do I need previous jewelry-making experience?
No. Previous experience is not required, and the tutor gives step-by-step instructions throughout the process.
Are children allowed to attend?
Children must be at least 10 years old. Anyone under 16 must be accompanied by a paying adult.
Is the workshop wheelchair accessible?
No. The activity takes place in two old period buildings with plenty of stairs and no lift. The buildings are not wheelchair accessible.
Just added around Dublin
- Women Of Ireland: Trailblazers & Pioneers★ 5.0 · 4 reviews
- Full Day Private Wicklow Tour★ 5.0 · 12 reviews
- Wicklow Mountains & Glendalough Luxury Private Day Tour★ 5.0 · 23 reviews
- Wicklow tour of Glendalough★ 4.5 · 8 reviews
- Premium Irish Whiskey Tasting Hosted by Local Dublin Expert★ 5.0 · 77 reviews
- Whiskey Tasting Tour of Dublin★ 5.0 · 117 reviews
- Dublin To Kilkenny Castle Waterford Crystal Private Car – Day Tour★ 5.0 · 8 reviews
- Waterford Crystal and Kilkenny Full-Day Rail Tour from Dublin★ 5.0 · 3 reviews
Dublin Tours, compared.

Dublin to Cliffs of Moher, including Wild Atlantic Way and Galway
Read our review →
Cliffs of Moher, Burren & Galway City Day Tour
Read our review →

Dublin to Cliffs of Moher, Burren, Wild Atlantic Way, Galway Tour
Read our review →
Dublin to Belfast Black Cab, Dunluce Castle and Giant’s Causeway
Read our review →
Kilkenny, Wicklow Mountains & Glendalough Day Tour from Dublin
Read our review →
Wicklow Mountains, Glendalough & Kilkenny Tour
Read our review →